The Ultimate Guide To Installing IPTV On Linux Devices
What is IPTV and Why Linux is Perfect for Streaming
Internet Protocol Television (IPTV) represents a revolutionary approach to content delivery, transmitting television programming through internet protocol networks rather than traditional terrestrial, satellite, or cable formats. This technology enables viewers to stream media content continuously, offering greater flexibility and control over their viewing experience. Unlike conventional broadcasting methods, IPTV delivers content through managed, dedicated networks, ensuring consistent quality and reliability.
Linux emerges as an exceptional platform for IPTV streaming due to its stability, customization capabilities, and robust performance. The open-source nature of Linux allows users to tailor their streaming environment precisely to their needs, optimizing resource allocation for seamless video playback. Additionally, Linux systems typically consume fewer resources than other operating systems, leaving more processing power available for demanding streaming applications and ensuring smooth playback even on modest hardware.
Compatible Linux Distributions for IPTV
Several Linux distributions excel in media streaming applications, each offering unique advantages for IPTV enthusiasts. Ubuntu stands out as a popular choice due to its user-friendly interface and extensive software repository, making IPTV application installation straightforward. For users seeking a lightweight option, Lubuntu or Xubuntu provide excellent performance on older hardware while maintaining full compatibility with streaming software.
Debian Stable offers remarkable reliability for always-on streaming setups, with its conservative update cycle ensuring minimal interruptions. Meanwhile, Arch Linux appeals to advanced users who prefer building their system from the ground up, optimizing every component specifically for media streaming purposes. Fedora Workstation provides cutting-edge features and excellent hardware support, particularly beneficial for newer systems with advanced graphics capabilities.
Hardware Requirements for Optimal IPTV Performance
Successful IPTV streaming on Linux requires appropriate hardware specifications to handle high-quality video decoding. For standard definition (SD) and high definition (HD) streams, a modern dual-core processor with at least 2GB of RAM proves sufficient. However, 4K streaming demands more substantial resources, including a quad-core processor and minimum 4GB of RAM for buffer-free playback.
Network connectivity represents another critical factor in IPTV performance. According to our comprehensive guide on internet speed requirements for IPTV, HD streaming typically requires 5-8 Mbps, while 4K content demands 25 Mbps or higher for optimal performance. A wired Ethernet connection generally provides more stability than Wi-Fi, though modern wireless standards can adequately support streaming when signal strength remains consistent.
Graphics capabilities also influence streaming quality. Most modern integrated graphics processors efficiently handle video decoding, reducing CPU load. For systems dedicated to media streaming, a dedicated graphics card may offer marginal improvements, though it’s rarely necessary for standard IPTV applications. Storage requirements remain minimal since IPTV primarily involves streaming rather than local content storage, though sufficient space for the operating system and applications remains essential.
When selecting hardware, consider the energy efficiency of components, especially for always-on streaming setups. Low-power processors and solid-state drives contribute to reduced electricity consumption while maintaining responsive performance. Many users successfully repurpose older computers as dedicated IPTV streaming devices by installing lightweight Linux distributions, extending the useful life of hardware that might otherwise become obsolete.
For those exploring various streaming options, our guide to the best IPTV services for different platforms provides additional context on how Linux compares to other streaming environments. The flexibility of Linux allows users to experiment with different IPTV applications and configurations, ultimately creating a personalized streaming solution that matches their specific requirements and preferences.
Linux Environment Setup for IPTV
Setting up a proper Linux environment is crucial for optimal IPTV performance. Most IPTV services work seamlessly across various Linux distributions, but Ubuntu and Debian-based systems are particularly well-supported. First, ensure your system meets the minimum requirements: at least 2GB RAM, dual-core processor, and sufficient storage for applications and temporary files.
Update your package repositories using sudo apt update && sudo apt upgrade to ensure you have the latest security patches and software versions. Additionally, consider installing a lightweight desktop environment if you’re using a resource-constrained device, as this can free up system resources for smoother IPTV streaming. For users planning to run IPTV on multiple devices, our IPTV Smarters Pro for four devices guide offers valuable insights into multi-device configurations.
Required Codecs Installation
Proper codec installation is essential for decoding various video formats used in IPTV streams. Most Linux distributions don’t include proprietary codecs by default due to licensing restrictions. Install essential multimedia codecs using:
sudo apt install ubuntu-restricted-extras(Ubuntu)sudo apt install libavcodec-extra(Debian-based systems)sudo dnf install gstreamer1-plugins-ugly(Fedora/RHEL-based)
These packages include crucial codecs like H.264, H.265 (HEVC), MPEG-4, and AAC audio codecs that are commonly used in IPTV streaming. For 4K content specifically, ensure HEVC support is properly configured, as detailed in our 4K IPTV plans guide. Testing your codec installation with sample video files before proceeding with IPTV setup can prevent playback issues later.
Network Configuration for Optimal Performance
Network configuration significantly impacts IPTV streaming quality. Begin by testing your internet speed using tools like speedtest-cli to ensure you meet the minimum requirements for your desired streaming quality. According to our internet speed requirements guide, you’ll need at least 25 Mbps for 4K streaming and 8-10 Mbps for HD content.
Configure your network interface for optimal performance by adjusting MTU (Maximum Transmission Unit) settings. Use ifconfig or ip link to check current MTU values and consider increasing them if your network supports jumbo frames. Additionally, prioritize IPTV traffic using Quality of Service (QoS) settings on your router to minimize buffering during peak usage times.
For users experiencing network-related issues, implementing a VPN can sometimes improve performance by providing more stable routing. Our comprehensive VPN for IPTV guide explains how to configure VPN connections specifically for streaming purposes.
Firewall and Security Configuration
Proper firewall configuration ensures both security and uninterrupted streaming. Configure your firewall to allow traffic on common IPTV ports while maintaining security:
- Allow outgoing connections on ports 80, 443, and 1935 (common streaming ports)
- Consider creating specific rules for your IPTV application
- Use
ufw(Uncomplicated Firewall) for easier management:sudo ufw allow out 80,443,1935
Regularly update your system security patches and monitor network traffic for any unusual activity. Meanwhile, ensure your DNS settings are optimized for performance—consider using reliable DNS servers like Cloudflare (1.1.1.1) or Google DNS (8.8.8.8) for faster domain resolution.
Finally, test your configuration by accessing your IPTV service and monitoring for any connectivity issues. If you encounter buffering problems despite proper setup, our buffering troubleshooting guide provides additional solutions for optimizing streaming performance.
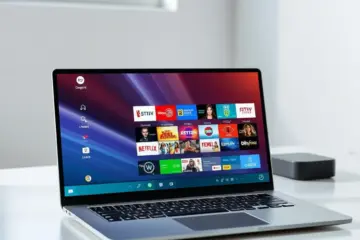
Installing and Configuring Kodi for IPTV on Linux
Kodi is available for most Linux distributions through official repositories or third-party sources. For Ubuntu and Debian-based systems, you can install it directly from the terminal using the command: sudo apt install kodi. Meanwhile, Fedora users can install it via sudo dnf install kodi, and Arch Linux users can find it in the community repository with sudo pacman -S kodi.
Alternatively, you can download the latest version directly from the official Kodi website if your distribution’s repository contains an older version. After installation, launch Kodi from your applications menu to begin the setup process.
Installing the PVR IPTV Simple Client Addon
Once Kodi is running, you’ll need to install the PVR IPTV Simple Client addon, which enables IPTV streaming functionality. Navigate to the “Add-ons” section from the main menu, then select “Install from repository.” Choose the “Kodi Add-on repository” and browse to “PVR clients.” Here, you’ll find “PVR IPTV Simple Client”—select it and click “Install.”
This addon serves as the bridge between your IPTV service and Kodi, allowing you to stream live TV channels directly through the interface. It’s compatible with various IPTV subscription formats, including M3U playlists and XMLTV electronic program guides.
Configuring Your IPTV Service
After installing the addon, you’ll need to configure it with your IPTV service details. Return to the main menu, go to “Settings” > “PVR & Live TV,” and enable “Enabled” if it’s not already active. Then, select “Configure” next to the PVR IPTV Simple Client.
In the configuration window, you’ll need to enter your IPTV service information. This typically includes:
- M3U Playlist URL: Enter the URL provided by your IPTV service provider
- EPG Source: Add the XMLTV URL for electronic program guide data
- Location: Choose whether to use remote or local paths
If you’re using an M3U link from your IPTV provider, simply paste the URL in the appropriate field. For users who prefer downloading the playlist file, you can select “Local path” and browse to the file location.
Optimizing Your Streaming Experience
To ensure smooth playback and reliable performance, consider these optimization tips:
- Internet Speed: Ensure you have sufficient bandwidth—typically 25 Mbps or higher for HD streaming
- Buffer Settings: Adjust the buffer size in Kodi settings if you experience buffering issues
- VPN Usage: Consider using a VPN for IPTV to bypass geo-restrictions and enhance privacy
- Regular Updates: Keep Kodi and the IPTV Simple Client updated to the latest versions
If you encounter buffering problems, our comprehensive buffering troubleshooting guide provides detailed solutions for common streaming issues.
Troubleshooting Common Issues
Several common problems may arise during setup. If channels aren’t loading, verify your M3U URL is correct and accessible. For EPG (electronic program guide) issues, ensure your XMLTV URL is properly formatted and contains current data. If you experience audio/video sync problems, adjust the audio offset settings in Kodi’s player options.
Connection timeouts often indicate network issues or server problems with your IPTV provider. In such cases, test your internet connection and verify your IPTV service is active. Remember that using a reliable IPTV subscription service significantly reduces technical problems and ensures consistent streaming quality.
Alternative IPTV Players for Linux
While Kodi with IPTV Simple Client offers excellent functionality, Linux users have several alternative options. VLC Media Player includes built-in IPTV support and can play M3U playlists directly. Additionally, dedicated IPTV applications like MyIPTV Player and FreeTuxTV provide streamlined experiences specifically designed for IPTV streaming.
For users seeking more advanced features, professional IPTV applications often offer better channel organization, recording capabilities, and multi-screen support. However, Kodi remains one of the most versatile options due to its extensive customization possibilities and active development community.
Setting Up VLC Media Player for IPTV on Linux
VLC Media Player is a versatile, free application that can transform your computer into a powerful IPTV client. This open-source media player supports numerous streaming protocols, making it an excellent choice for IPTV enthusiasts who want flexibility and control over their viewing experience.
Before diving into setup, ensure you have the latest version of VLC installed on your device. The software is available for Windows, macOS, Linux, and even mobile platforms, providing consistent performance across different operating systems.
Adding Your IPTV Playlist to VLC
The first step in configuring VLC for IPTV is importing your channel playlist. Most IPTV providers deliver content through M3U playlists, which VLC handles seamlessly. Begin by launching VLC Media Player and navigating to the “View” menu, then select “Playlist” to open the sidebar panel.
Next, click on “Media” in the top menu and choose “Open Network Stream.” Here, you’ll paste your IPTV provider’s M3U URL or upload a local M3U file. If you’re using a subscription service, they typically provide this playlist link in your account dashboard. For those exploring different providers, our guide to the best IPTV subscriptions can help you find reliable options.
Once you’ve entered the playlist URL or selected your local file, click “Play” to load the channels. VLC will process the playlist and display available channels in the left sidebar. You can then save this playlist for future use by right-clicking on it and selecting “Save Playlist to File.”
Managing and Organizing Your IPTV Channels
Effective playlist management is crucial for an optimal IPTV experience. VLC allows you to create custom playlists, favorite channels, and organize content by category. To mark channels as favorites, simply right-click on any channel in the playlist and select “Add to Favorites.” This creates a separate favorites section for quick access to your most-watched content.
For better organization, consider creating multiple playlists for different types of content. You might separate sports channels from movies or news networks. VLC supports this through its playlist management features, enabling you to import and switch between different M3U files as needed.
If you encounter issues with specific channels not loading, the problem might be with the stream source rather than VLC itself. In such cases, contacting your IPTV provider for updated playlist links often resolves the issue. Understanding how M3U links work can help troubleshoot these situations more effectively.
Optimizing Streaming Performance in VLC
VLC offers numerous settings to enhance your IPTV streaming quality and stability. Access these by going to “Tools” > “Preferences” and switching to “All” settings in the bottom left corner. Under “Input/Codecs,” adjust the network caching value to optimize buffering. Increasing this value to 1000-2000ms can significantly reduce interruptions on slower connections.
For hardware acceleration, navigate to “Input/Codecs” and enable “Hardware-accelerated decoding” if your system supports it. This reduces CPU usage and can improve playback of high-resolution streams, including 4K content if your IPTV plan includes 4K channels.
Network optimization is another critical factor. If you experience consistent buffering, consider using a wired Ethernet connection instead of Wi-Fi. Additionally, VLC’s advanced settings allow you to adjust the network synchronisation threshold, which can help with audio-video sync issues common in IPTV streams.
Advanced VLC Features for IPTV Enthusiasts
Beyond basic streaming, VLC includes features that enhance the IPTV experience. The program supports electronic program guides (EPG) when available in your playlist, allowing you to see what’s currently playing and what’s coming up on each channel. Enable this feature through the “View” menu by selecting “Program Guide.”
Recording capabilities represent another powerful VLC feature for IPTV. To record a live stream, simply click “View” > “Advanced Controls” to reveal the record button in the player interface. Click this button during playback to capture the stream to your local storage. This is particularly useful for saving live events or creating personal archives of favorite shows.
For users seeking additional customization, VLC supports skins and extensions that can modify the interface and add